My wife was wanting a couple of carnival/festival/ticket booths for VBS this year.
She found a picture at
http://www.vintagerevivals.com/2011/04/school-carnie-vr-style.html that she liked. It looked simple enough. We really liked the idea since we could use the same booths for VBS (checkin), in our Kid's room (prize store), and in our Fall Festival. Our initial cost estimates were around $100 total for two booths, but everything normally costs more than I think it will once I get into it.

The site didn't have any details on dimensions or construction steps. So we had to make our own dimensions. We started by printing a picture of the booth and making educated guesses at the lengthes we wanted to make everything.

We started by saying we wanted it to be 4 feet wide (this helps since most sheet goods are 4 feet in one direction). Then we thought it should be 8 feet tall in the back and 7 feet tall in the front. Again sheet goods are normally 8 feet in one direction. This means less cutting involved. Then we decided the front should be 3 feet tall and then the tabletop.
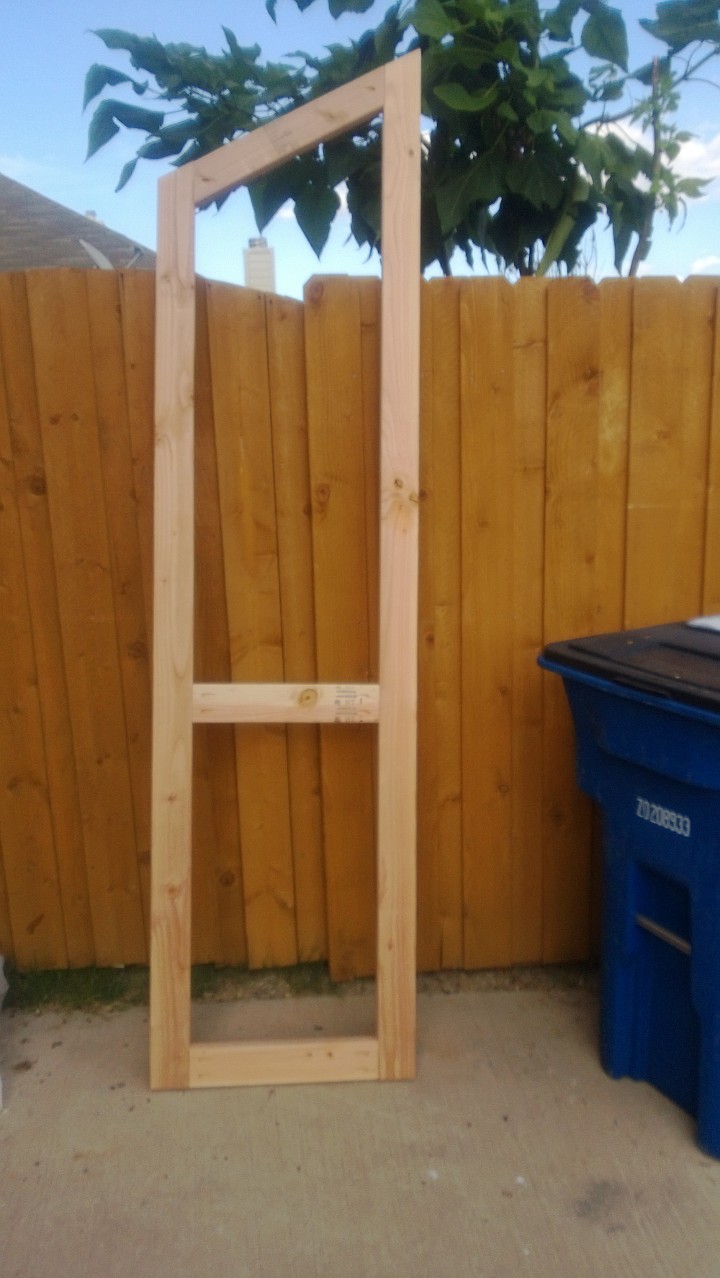
So after a quick run to Home Depot to get 16 2"X4"X8', I ended up making the following side frame. Again the front 2X4 is 7 feet tall with a 30 degree angle cut at the top. The back 2X4 is 8 feet tall with a 30 degree angle cut at the top. The two boards at the bottom are 17" long. I wanted the booth to be 2 feet deep. So 24" - 3.5" - 3.5" = 17". I took the 3.5" twice because the is the size of the 2X4 itself.

I screwed them together after making the pocket holes using my Kreg Jig. NOTE: I know I'm always talking about using my Kreg Jig. I am in no way sponsored by Kreg. I just like the simplicity and strength of the joints made with their products. Now if someone from Kreg is reading this and would be interested in sponsoring me, I would be very willing to talk. I really want a Kreg Router Table.
For the board at the top, I started with a 28" board and simply held it where it needed to go and drew lines to make the cuts. Ironically it ended up being 30 degree cuts on both ends also. I tried to calculate the angle but got lost somewhere....
So I made a second frame board using the same technique. Just reversing everything.

Then the idea was simply to secure the two frame pieces together using cross boards. These cross boards were cut to 45". I wanted the booth to be 4 feet wide so I made the cross boards 48" - 1.5" - 1.5" to take into account the smaller side of two 2X4's.

I used the Kreg to make pocket holes for the crossboards, but also added a 3.5" screw through the 2X4 just for added strength.
I ended up using 3/16" hardboard for the sides. I bought it at Home Depot. I bought two 4'X8' sheets. I needed it cut in half. I needed four 2'X8' sections. I got the Home Depot guy to cut it with their track saw. Perfect cuts. They don't charge for this. Unless you have an awesome large table saw, letting them cut it for you is much easier.
So I ended up putting the 2'X8' sections on the sides. I also had Home Depot cut a seperate 4'X8' sheet into 3'X4' sections for the front of the booth. I secured all of these boards onto the frame. The next step is to make the tabletop. A 2'X4' of some type of particalboard/pressedboard/plywood/MDF can be used. I used a 3/4" MDF. You'll just need to cut slots for the board to slip into the frame working around the 2"x4" frame. We decided to make ours stick out from the booth 2".

So after putting this much of the booth together my wife started the priming/painting.


So the next step was to make the roof. We liked the tin roof in the original picture. After reading online on the best way to cut tin, I decided to get a grinder blade for my circular saw. I initially cut the tin for 3' long.

After putting it up just to look at it, it looked a little long:


So I shortened them to 33". This seemed more appropriate.
We added a hanging sign to specify what the booth was for.
Here's the finished product:


I think it turned out pretty well. Tomorrow we'll move them to the church and set them up. If you happen to build something similar, I would love to see pictures.
Here's a new picture:

After VBS, we put the booths in our Kid's Room. We use them as our store (where kids can buy stuff with the bucks they earn during service). It also works well to seperate the kitchen from the rest of the room...