Saturday, April 19, 2014

Connect Four DIY

Below is how I built my Connect Four Game. If you aren't interested in building, here are some already done for you from Amazon:

ECR4Kids Jumbo 4-To-Score Oversized Game

Giant 4 Connect in a Row

GoSports Giant 4 in a Row Game with Carrying Case - 3 foot Width - Made from Wood

Giant UP 4 IT (4ft tall 4 in a Row Game)

We decided for Easter this year we wanted to do a big game. My wife really wanted the Connect Four Basketball that we saw on the cruise. It just seemed a little out of hand (price wise). Just buying 42 basketballs of any quality would be pretty expensive. So we decided to just do a normal life size Connect Four.

I saw a couple of cool options online:

http://makezineblog.files.wordpress.com/2008/07/giant_connect_four.jpg?w=500&h=410

http://www.pinterest.com/pin/302726406173591754/

http://www.pinterest.com/pin/225672631302164085/

and of course a few more that I can't seem to find now.

So the first thing you need to do is decide how big your "checkers" will be. This will decide the height/width of the game. One of the ones I saw, the guy used 6" checkers. My wife wanted it bigger. Looking impressive (especially to kids) in person. So I started thinking about how big I could make it. I was dreading making 42 perfectly round checkers. That didn't sound like fun. I saw one post where the guy used cork hot pads as the checkers. I really liked this idea. Not heavy. Precut. Just paint and go. I found the perfect candidate at IKEA.

WP_20140405_001 WP_20140405_002 (1)

You can also order the cork circles from Amazon if you don't have an Ikea close: Cork Circles

There were a little over 7" each. Best of all, they were $2.99 for a pack of 3. So 14 packs later, we've got 42 checkers.

So I kinda new my sizing now. I bought a 4' by 8' sheet of 1/2 MDF from home depot. I bought some 1" by 1/2" MFD type boards. I was using them as the spacers between the checkers. The spacers go up and down the length of the connect four board. Whatever size you use, need to be just a hair thicker than the checkers. But you don't want them thick enough to allow two checkers to get on top of each other. So at this point, you can start laying out the boards as a test:

WP_20140405_009 WP_20140405_003

The biggest thing is to make sure there is enough room for the checker to slide up and down, but not enough room for it to go far to the left or right.

I usually do best if I can draw out what I'm thinking. Here's my "doodle" with my spacing on it.

WP_20140409_001

Once you have decided on your layout, start glueing down your spacers to your board:

WP_20140405_005 Glue Brushes WP_20140405_004 WP_20140405_010 WP_20140405_008 WP_20140405_007 WP_20140405_006

Somebody told me once, "You can never have too many clamps". I'm now starting to understand what they mean.

Here's some links to some of the clamps used: Irwin Clamp

Irwin Clamp Set

Wolfcraft Clamp

Once you get all the spacers glued down, you can start thinking about cutting the holes. I ended up buying a 6" hole saw to do the cutting.

WP_20140405_012

The thought of making 42 cuts any other way, would probably make me lose my mind (and maybe my salvation). The hole say was about $50, but it was money well spent.

Here's the hole saw I used: Bosch Hole Saw

I also would suggest using a corded drill: Dewalt Corded Drill

Trying to cut this many holes with a cordless drill will prove to be a pain. But you'll enjoy the cordless drill and impactdriver for the rest of the project: Dewalt 20V Cordless Drill/Driver Combo Set

The cuts are centered mid ways between the spacers. The bottom one is exactly 1/2 the size of the checker from the bottom. Then the next ones are exactly the size of the checker from the previous. On a connect four board, there are 6 holes up and down and 7 across.

WP_20140405_013 WP_20140405_014

I was having issues getting the center bit centered on the holes so far. Then I had a thought (something probably everyone else already knew). Start the holes with a regular drill bit, then I can just drop the hole saw in the starter hole and let 'er rip. That worked much better:

Try Amazon Prime 30-Day Free Trial" target="_blank" rel="noopener">Try Amazon Prime 30-Day Free Trial

WP_20140405_016

Holes all cut now:

WP_20140405_017

At this point, I decided to spray paint the yellow spacers yellow. I wasn't sure if they would show in the final product, but I didn't want them to be white if everything else was yellow. So in the final product they do show (but only if viewing from the far left/right).

I needed to clean up the cuts on the board I had initially wanted to use a round-over bit on my router, but decided to just use sand paper. Cleaned it up nicely.

WP_20140409_004 WP_20140409_005

I now need to prime/paint the front board:

WP_20140409_006

Now I needed to look at putting the back on. I could have (probably should have) just bought another 1/2" MDF 4'X8' MDF sheet for the back. But since I had a few leftover pieces (and the fact that I'm very cheap), I decided to make due.

WP_20140409_008 WP_20140409_003 WP_20140409_007 WP_20140409_009 WP_20140409_010

And I cut off the excess board on the side. This was actually used as part of the back:

WP_20140409_002

At this point, I wanted to check and make sure everything worked on the game. I tried a set of checkers in each lane of the board. just to make sure everything worked:

WP_20140409_011 WP_20140409_015 (1)

I forgot to mention. Before I put on the back boards, I painted the inside of them yellow. I had considered putting holes in the back board also, but I knew the way we would use it, it would only need to be visible from the front. Now I painted the front of the game:

WP_20140409_016 WP_20140409_017 WP_20140412_002 WP_20140412_003

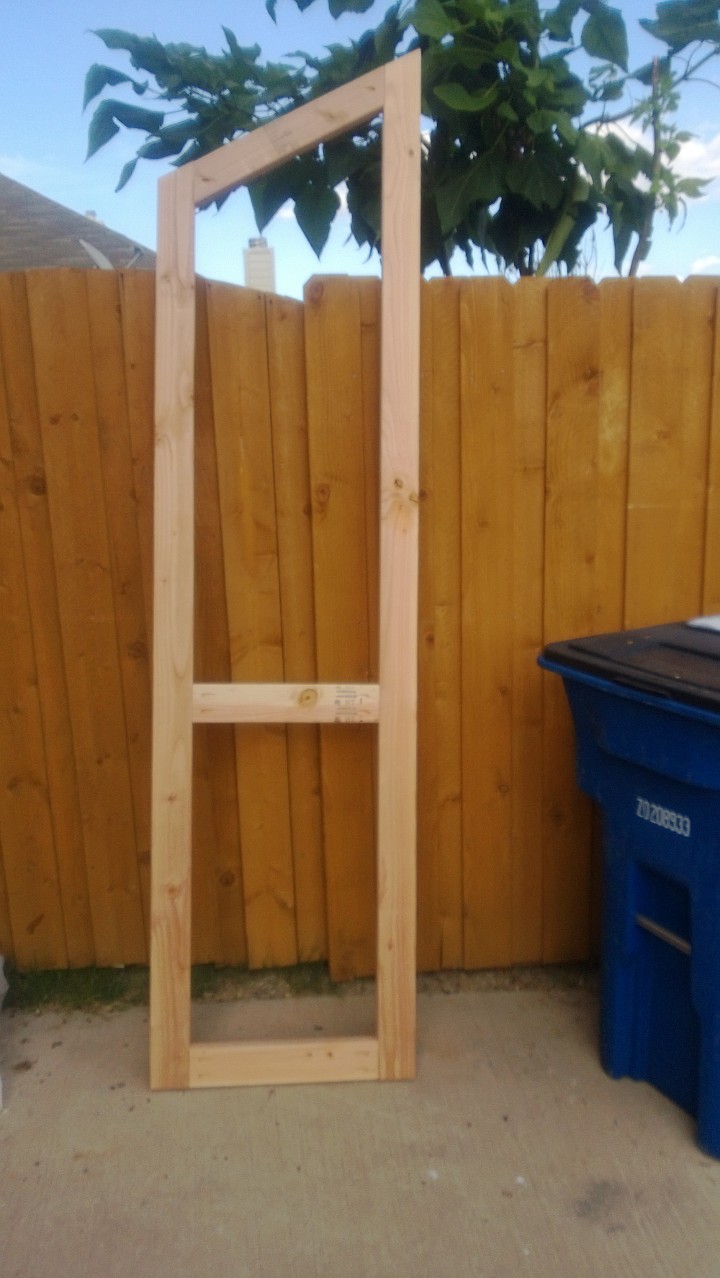
Now I needed to start working on the legs (base) of the game. I used some spare boards that I had laying around. I used 2"X4" board for the sides, and a piece of 2" by 6" for the base. I added casters on the bottom. I added a piece of plywood to make it look more like the connect for game. I cut circles in the plywood:

This is where I started laying out the plywood. Note the 2"X4" going up and the 2"X6" on the base:

WP_20140412_004

I then added a circle using a stir stick (free) from Home Depot. I put multiple holes in it. I put a screw in one end and then ran a pencil in the other:

WP_20140412_005

After cutting out with a jig saw, I put the base together:

WP_20140412_006

Jig Saw

A little blue paint:

WP_20140412_007

Casters

Now that the base/legs are ready, I needed to attach them to the game:

WP_20140412_009 WP_20140412_014

A nice collection of squares will help at every level of this project:

Carpenter Square

Combination Square

Speed Square

So I needed to figure out how to hold the checkers in place when I wanted, but be able to let them out when the game is done.

I ended up making a simple board that would move left and right. This would allow the checkers to be held in place during gameplay by a small piece of wood. Then when moved to the right or left, they would let the checkers out. I really don't have a good way to do this other than just experiment around and see what works for you. I also thought about the possibility of using a solid board and hinges. I would just have to come up with a way to secure the board in place...

WP_20140412_002 WP_20140412_003 WP_20140412_010 WP_20140412_011 WP_20140412_012 WP_20140412_013

At this point, I ended up getting my son to help me sit it up for the first time. Note I also added casters to the bottom. This thing is heavy. Even using 1/2" MDF. It still has a lot of weight.

WP_20140412_015

Now we are starting to look like a real connect four game. Problem number 1: My wife saw it and said it was too tall. After a brief frustration moment, I put the game back down and decided to take 1' off of the side boards. This would make it low enough that kids could put in the checkers while standing on a stepstool.

Shop Amazon Warehouse Deals - Deep Discounts on Open-box and Used Tools & Home Improvement

Here's a picture of some of the checkers drying after being spray painted. I had problems getting them to dry. We had quite a bit of rain lately... I'm just glad I started when I did.

WP_20140416_002

Red Spray Paint

Black Spray Paint

I wanted to put some type of sign/logo on the game. I found this one online that I like...

http://web-vassets.ea.com/Assets/Richmedia/Image/FullImageLogo/connect-4-logo.png?cb=1334003551

So I wanted to make something a little different. For one, I can't draw letters good at all. I wanted them to be 3D-ish. So I wanted them cut out. But I didn't want to cut them out. I found some at Hobby Lobby. Not exactly the size I wanted, but close enough. I cut out the rest of the wood. Here's the logo during construction:

WP_20140416_003 WP_20140418_001

Some Similar letters from Amazon: Wooden Letters

And here's a picture of the final game with the logo applied (and drying).

WP_20140419_004

Tomorrow is Easter. I'll post some pics without the clamps and during gameplay. I know the teenagers tried it out today during service rehearsal and I hear they loved it...

Here's a couple of pictures of the game on Easter morning:

Here it is in the front of the room. Ready for play:

WP_20140420_001

Here's the game with a few checkers dropped in:

WP_20140420_002

I will say we ran into one issue. One of the checkers broke. I think the teen that was helping put them in, put them in a little harder than just dropping. But anyway, only 1 out of 42 broke. I'll take it...

Now the next big problem. Where do we store this beast.

UPDATE: 04/10/2016. This is a really popular blog post. I get a lot of questions asking for specifics or people saying they are going to build one. I got some pictures from . He had a couple of pics from the game he made. He made it a little bit smaller. Said he used 5" checkers. He also had a great idea. He made the back a lego wall... Awseome!!!

I put the pics he sent on the following post:

https://drowland.wordpress.com/2016/04/10/other-peoples-connect-4/

Friday, August 9, 2013

Game Ideas from a Cruise

Last week my family and I went on a Carnival Cruise.  It was our first cruise.  We weren't really sure what to expect, but we really enjoyed it.

One of the cool parts was the Hasbro The Game Show.  There were 3 instances of the show during the week.  We saw games like Connect 4 Basketball, Operation Skee ball, Simon Flash, Sorry Sliders, Yahtzee Bowling and others. 

The games looked really fun.  So of course the entire time I'm watching, I'm thinking through how I can build versions of these games for our Kid's Church. 

Here's a few of my pictures.  Of course you can find much better pictures by just doing a Google search.

WP_20130729_015  WP_20130729_018  WP_20130731_010  WP_20130803_044

I wanted to start building one of them as soon as I got home, but I had a notice from my HOA that my fence is in need of repair.  So I guess my freetime will now be devoted to fence building.  Once finished, Connect 4 Basketball and Yahtzee Bowling await.

Friday, July 12, 2013

Building a Carnival/Festival/Ticket Booth

My wife was wanting a couple of carnival/festival/ticket booths for VBS this year.

She found a picture at http://www.vintagerevivals.com/2011/04/school-carnie-vr-style.html that she liked. It looked simple enough. We really liked the idea since we could use the same booths for VBS (checkin), in our Kid's room (prize store), and in our Fall Festival. Our initial cost estimates were around $100 total for two booths, but everything normally costs more than I think it will once I get into it.

original booth

The site didn't have any details on dimensions or construction steps. So we had to make our own dimensions. We started by printing a picture of the booth and making educated guesses at the lengthes we wanted to make everything.

WP_20130711_007

We started by saying we wanted it to be 4 feet wide (this helps since most sheet goods are 4 feet in one direction). Then we thought it should be 8 feet tall in the back and 7 feet tall in the front. Again sheet goods are normally 8 feet in one direction. This means less cutting involved. Then we decided the front should be 3 feet tall and then the tabletop.

So after a quick run to Home Depot to get 16 2"X4"X8', I ended up making the following side frame. Again the front 2X4 is 7 feet tall with a 30 degree angle cut at the top. The back 2X4 is 8 feet tall with a 30 degree angle cut at the top. The two boards at the bottom are 17" long. I wanted the booth to be 2 feet deep. So 24" - 3.5" - 3.5" = 17". I took the 3.5" twice because the is the size of the 2X4 itself.

WP_20130708_001

I screwed them together after making the pocket holes using my Kreg Jig. NOTE: I know I'm always talking about using my Kreg Jig. I am in no way sponsored by Kreg. I just like the simplicity and strength of the joints made with their products. Now if someone from Kreg is reading this and would be interested in sponsoring me, I would be very willing to talk. I really want a Kreg Router Table.

For the board at the top, I started with a 28" board and simply held it where it needed to go and drew lines to make the cuts. Ironically it ended up being 30 degree cuts on both ends also. I tried to calculate the angle but got lost somewhere....

So I made a second frame board using the same technique. Just reversing everything.

WP_20130708_004

Then the idea was simply to secure the two frame pieces together using cross boards. These cross boards were cut to 45". I wanted the booth to be 4 feet wide so I made the cross boards 48" - 1.5" - 1.5" to take into account the smaller side of two 2X4's.

WP_20130708_006

I used the Kreg to make pocket holes for the crossboards, but also added a 3.5" screw through the 2X4 just for added strength.

I ended up using 3/16" hardboard for the sides. I bought it at Home Depot. I bought two 4'X8' sheets. I needed it cut in half. I needed four 2'X8' sections. I got the Home Depot guy to cut it with their track saw. Perfect cuts. They don't charge for this. Unless you have an awesome large table saw, letting them cut it for you is much easier.

So I ended up putting the 2'X8' sections on the sides. I also had Home Depot cut a seperate 4'X8' sheet into 3'X4' sections for the front of the booth. I secured all of these boards onto the frame. The next step is to make the tabletop. A 2'X4' of some type of particalboard/pressedboard/plywood/MDF can be used. I used a 3/4" MDF. You'll just need to cut slots for the board to slip into the frame working around the 2"x4" frame. We decided to make ours stick out from the booth 2".

WP_20130709_001

So after putting this much of the booth together my wife started the priming/painting.

WP_20130709_002 V__FC45 V__E3DC V__589D

So the next step was to make the roof. We liked the tin roof in the original picture. After reading online on the best way to cut tin, I decided to get a grinder blade for my circular saw. I initially cut the tin for 3' long.

WP_20130711_008

After putting it up just to look at it, it looked a little long:

WP_20130710_002 WP_20130710_001

So I shortened them to 33". This seemed more appropriate.

We added a hanging sign to specify what the booth was for.

Here's the finished product:

WP_20130712_001 WP_20130712_002

I think it turned out pretty well. Tomorrow we'll move them to the church and set them up. If you happen to build something similar, I would love to see pictures.


Here's a new picture:

WP_20130811_021

After VBS, we put the booths in our Kid's Room.  We use them as our store (where kids can buy stuff with the bucks they earn during service).  It also works well to seperate the kitchen from the rest of the room...


Saturday, June 15, 2013

Adding a second screen/projector

In one of my previous posts, I went through the process of building a DIY projector screen.  I'm going through the process again.  I'm adding a second projector to the right hand side of our kid's church room.

I'm planning to have it so it can show the same video as the main projector or have an independent image.  During worship and bumper-type videos, the images will be the same on both.  But during games, I'll have ScoreKeep (from Digital Stache) up on one screen and whatever video is needed on the other.  Probably something like a Minute to Win It timer or something.

I'll update this post with the progress in the next few weeks.

I'm considering using this VGA Matrix switcher to control which video goes to which monitor.  I'm not sure how well it will work, but for the price, it is hard to go wrong.


Update as of 07/25/13:  I haven't had a lot of time to post lately because of VBS.  But we did get this solution in place.  Now we have two projectors/screens.  We use the Matrix VGA switcher from Monoprice.  Here's a couple of pictures:

This picture shows the screens with the projectors off

WP_20130713_001

This image shows the screens with the projectors on.  Both projectors are throwing the same image.  Notice the difference in image quality.  Even though they are pretty much the same projector, the newness of one is a big jump over the other.   We played with the brightness and whiteness quite a bit, but weren't able to get it any closer.  I guess that's one downside to using cheap projectors.

WP_20130713_007

Unless there's a lot of white in the background, they looks pretty much identical.

WP_20130713_004


This image shows the front of the Matrix switcher.  The left button contols the left projector.  The right button the right projector.  You press the button to select source 1, source 2, or nothing.

WP_20130713_003


This image shows the back of the VGA Matrix switcher.  There are two sources (both computers) and two outputs (both projectors).

WP_20130713_005


The only issue we've seen is that the Matrix switcher isn't an instant switch.  It takes a bit for the image to change.  This caused two issues.  One the projector would think the image dropped and display its logo.  To fix this, we changed the projector settings to only display a black screen and not the logo.  The second issue was that during the change, the projector would begin searching for a signal.  Again, we simply turned this off in the projector settings.  No big deal.

Soon I want to make a quick video showing how everything works.


Sunday, February 3, 2013

Break My Heart Game - Part 3

Here's the final product:

WP_001279

Here's a few pictures of the gameboard during the game.

WP_001282 WP_001287 WP_001285 WP_001283

The kids had to answer questions to earn a chance to punch the board and win a prize.  Today we only had prizes behind the paper.  In the next few weeks we might add a few "funny" things behind the boards.

I guess the design works OK, but it is a pain to get the buckets on and off the board.  The method of screwing on the handles works, but it might need some refinement.  I think in the future, I might try to come up with a way to use boards with a slit.  The slit would hold the lips on the buckets.  Then I could slide them on/off the board.

Here's a picture of the gameboard after all prizes were claimed:

WP_001288


The kids had to answer questions to earn a chance to punch the board and win a prize.  Today we only had